
Newtonian reflector telescope build
I have always been fascinated by astronomy. I took an astronomy course in college as part of my general education and it fueled my interest even further. Learning how the universe, stars, galaxies and celestial objects work is extremely intriguing and humbling.
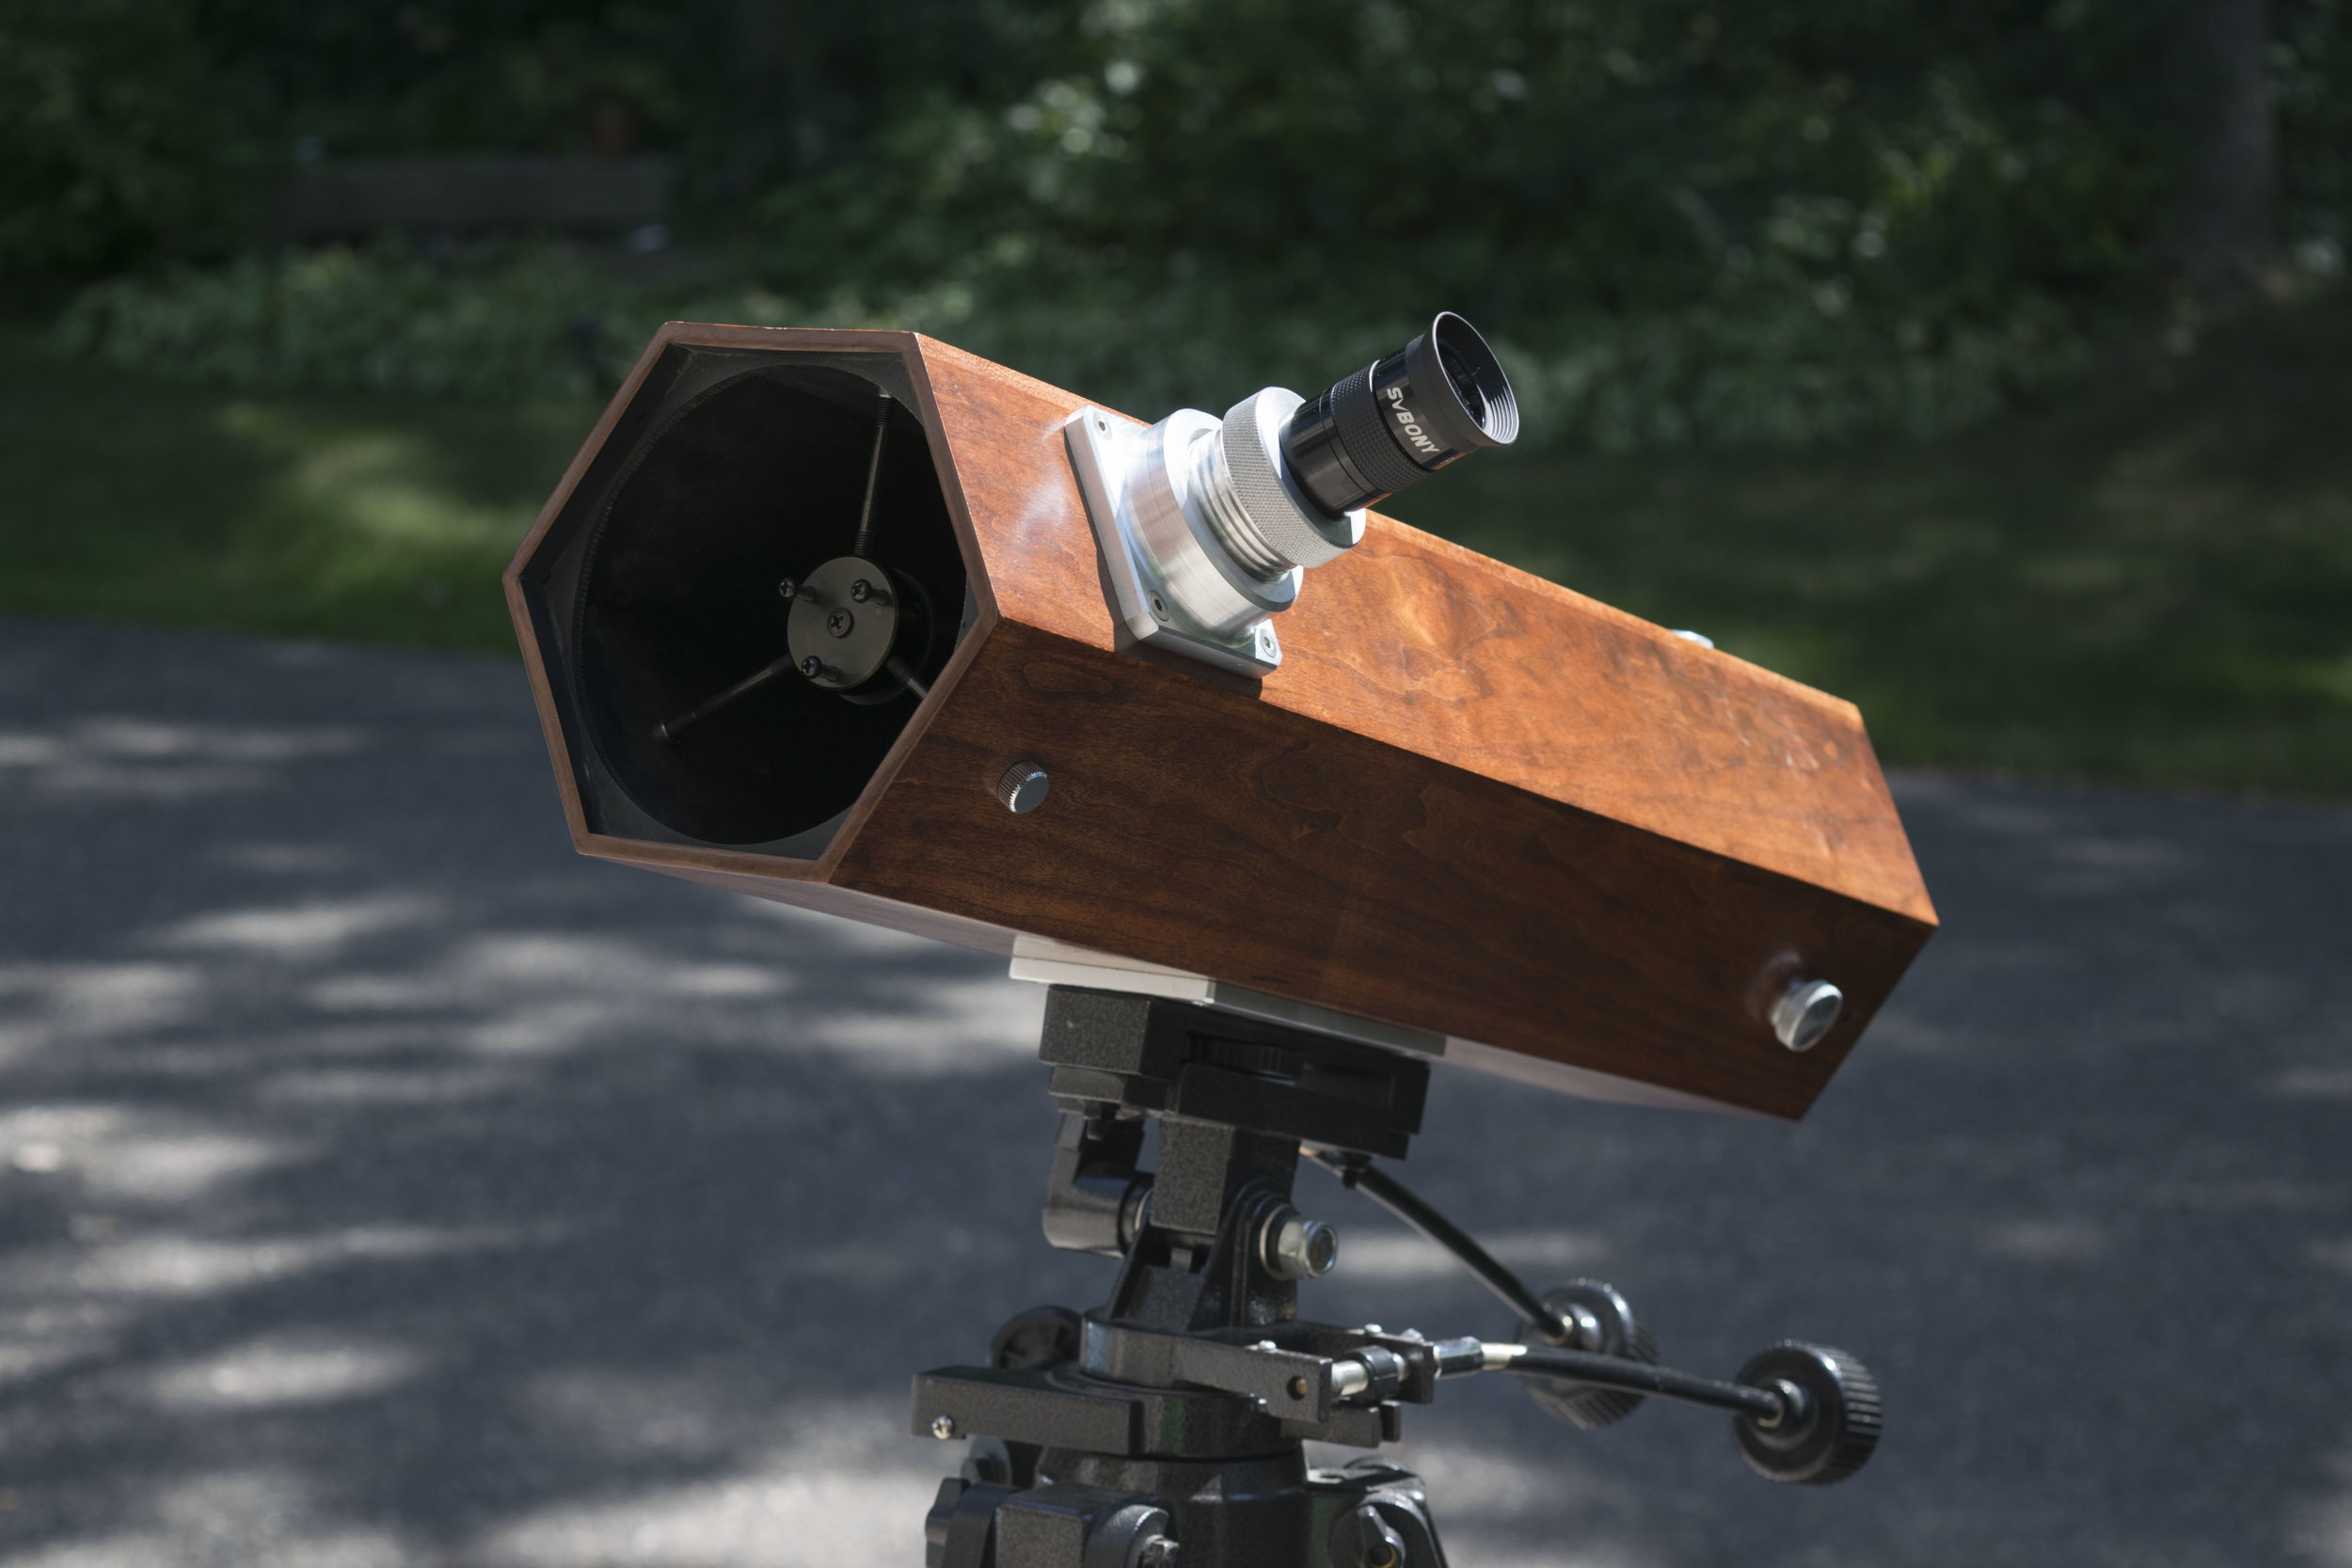
Wooden newtonian reflector telescope

In this astronomy course, students were given plastic telescope kits (google Galileoscope) loosely based on Galileo's design. Even though it is just a small 50mm refractor (lens telescope), I was able to see the Andromeda galaxy, using a rickety old camera tripod. I was hooked! Determined to get better views of celestial objects, I started to think about how I could build a better telescope.
I was very busy with school, so if I was going to build one, it had to be simple and quick. I decided I wanted to make a reflecting telescope for the low cost and light gathering abilities. Invented by Issac Newton around 1668, a reflecting telescope uses parabolic mirrors to focus the light, rather than lenses like a refractor. I went on eBay and ordered an inexpensive 114mm/f4.4 primary and secondary mirror.
Sorry for the low quality photos. I really wish I would have documented the early stages of the build better.


Being in school, I didn't have the free time to make a nice OTA for the mirror, so I whipped up a tube using old coffee cans! This actually worked surprisingly well for a few years. I'm sure many people didn't have a clue why I was staring into a coffee can in the dark.

I 3D printed a simple Crayford styrle focuser, rather than buying one.

Fast forward a few years

I had a little bit of free time between school and work and thought I would finally make a 'real' Outer Tube Assembly for the little reflector. Using a great online tool called "Newt For The Web" I can input the specs for my mirrors and design the tube assembly with high accuracy.
Multiple factors prevented me from being able to use the scope for visual and photographic use with a single setup. I would have to make the primary mirror be able to move back and forth by 1.5" to bring the focal plane out far enough to reach infinity focus on the sensor of my Nikon D3300. I figured out optimized dimensions so I would be able to use the telescope for not only visual observing, but for astrophotography as well. This would help me to design a low-profile focuser to increase the portability.

I could have gone many directions with the design of the OTA. I originally wanted to make a more contemporary styled collapsible design out of aluminum. In reality, this would have made the scope harder to us, because it would add extra steps to setting it up. My lack of free-time dictated a simpler approach. I decided to make the "tube" out of some rough-cut cherry in a hexagonal shape. A bit of a nod to William Herschel's telescopes. I milled the 3/4" board down and surface sanded it to the correct thickness. Being on campus, I had access to a laser cutter, so I used it to cut hexagonal baffles that would serve as an inner structure, as well as block out stray light.
I assembled it by just cutting a single correct angle on each board and leaving it a little long, rather than trying to cut two sides to the exact dimensions. This allowed me to 'easily' glue up the tube. After it dried I trimmed down the excess.

The focuser
The next step was to design and build a focuser. I wanted it to be simple to use with minimal complexity, as this is supposed to be a simple telescope that I can just throw in the car and bring with me wherever I feel.

Scrap aluminum to construct the focuser.

The base of the focuser had to be turned round on the mill because I didn't have a 4-jaw chuck for my lathe to mount square stock.

This was the first time I have ever cut threads on a lathe. I decided to use ACME threads.

My little Atlas 6" lathe works great. They don't make tools like they used to.


After milling the focuser base round, I was able to mount it in my lathe to bore and cut threads.

Improvised boring bar out of some scrap steel.

Success.
Finishing the tube.


Primary mirror cell
The primary mirror cell is pretty simple. I cut three brackets out of some aluminum L-channel and milled slots to allow carriage bolts to engage into. The top and bottom pieces are just some scrap plywood painted black. Springs were cut from a single larger spring. This cell actually works quite well. Locking bolts are not really needed because of the mirrors small mass. Collimnation is a breeze, you can just reach in and adjust the bolts by hand. I still need to machine some fancier thumbsrews to replace the wingnuts.


An attempt at photographing the Orion Nebula. I guess the next step is to build an equatorial mount so I can take longer exposures without star-trails.

"somewhere near the Ford Galaxie"


